Introduction
When you purchase an SSL certificate, you typically receive it as a .crt or .pfx file. This certificate usually contains only the main certificate and does not include the root or intermediate certificates. While the SSL certificate may work in many places, it can fail in environments that require proper certificate chaining.
To ensure full compatibility and trust, you need to include the root and intermediate certificates in your SSL chain. This guide will walk you through the process of obtaining and incorporating these missing certificates into your main certificate.
Understanding Certificate Chaining
A certificate chain consists of:
- Root Certificate – The top-most trusted certificate issued by a Certificate Authority (CA).
- Intermediate Certificates – Certificates issued by the CA to act as an intermediary between the root and end-user certificates.
- Main Certificate – The SSL certificate issued to your domain.
Most modern operating systems, such as Windows, store trusted root and intermediate certificates by default. If you inspect a certificate in Windows, you will typically see the entire certificate chain.
Step 1: Download the Required Certificates
To create a complete certificate chain, you need to download the root and intermediate certificates from your system.
Steps to Download the Certificates in Windows:
- Locate your SSL certificate and double-click on it.
- Go to the Certification Path tab to see the complete chain.
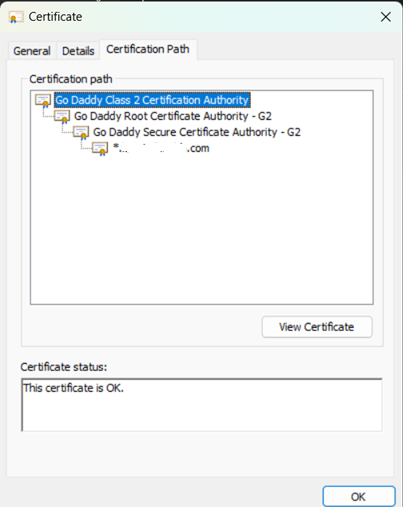
- Click on each certificate in the chain except the main certificate.
- Click View Certificate → Details → Copy to File.
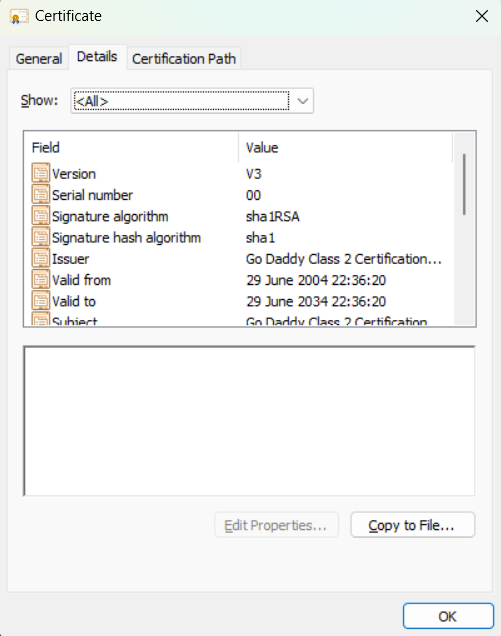
- Follow the wizard to export the certificate in Base-64 encoded X.509 (.CER) format.
- Open the Certificate Manager to download it (certmgr.msc in Run).
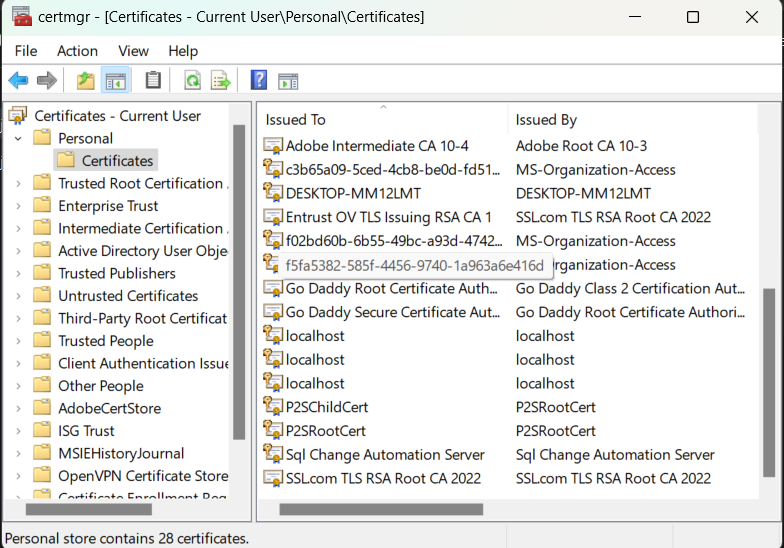
Repeat these steps for all root and intermediate certificates.
Step 2: Merge Certificates into a Single File
Now that you have downloaded all the required certificates, you need to combine them into a single file.
- Open your main SSL certificate file (main.crt) in a text editor.
- Copy and paste the contents of each downloaded certificate at the end of the main certificate file.
- Ensure the certificates are in the following order:
- Main Certificate (issued to your domain)
- Intermediate Certificate(s)
- Root Certificate
Save the file after adding all the certificates.
Step 3: Generate a PFX File with Certificate Chain
Now, you can generate a .pfx file that includes the complete certificate chain using OpenSSL.
Run the following command:
openssl.exe pkcs12 -export -out output.pfx -inkey private.key -in main.crt
Explanation:
- output.pfx – The output PFX file.
- private.key – The private key associated with your SSL certificate.
- main.crt – The certificate file containing the full certificate chain.
Step 4: Verify the Certificate Chain
Once the PFX file is created and uploaded to the required place, you can test your SSL certificate on various SSL checker tools like:
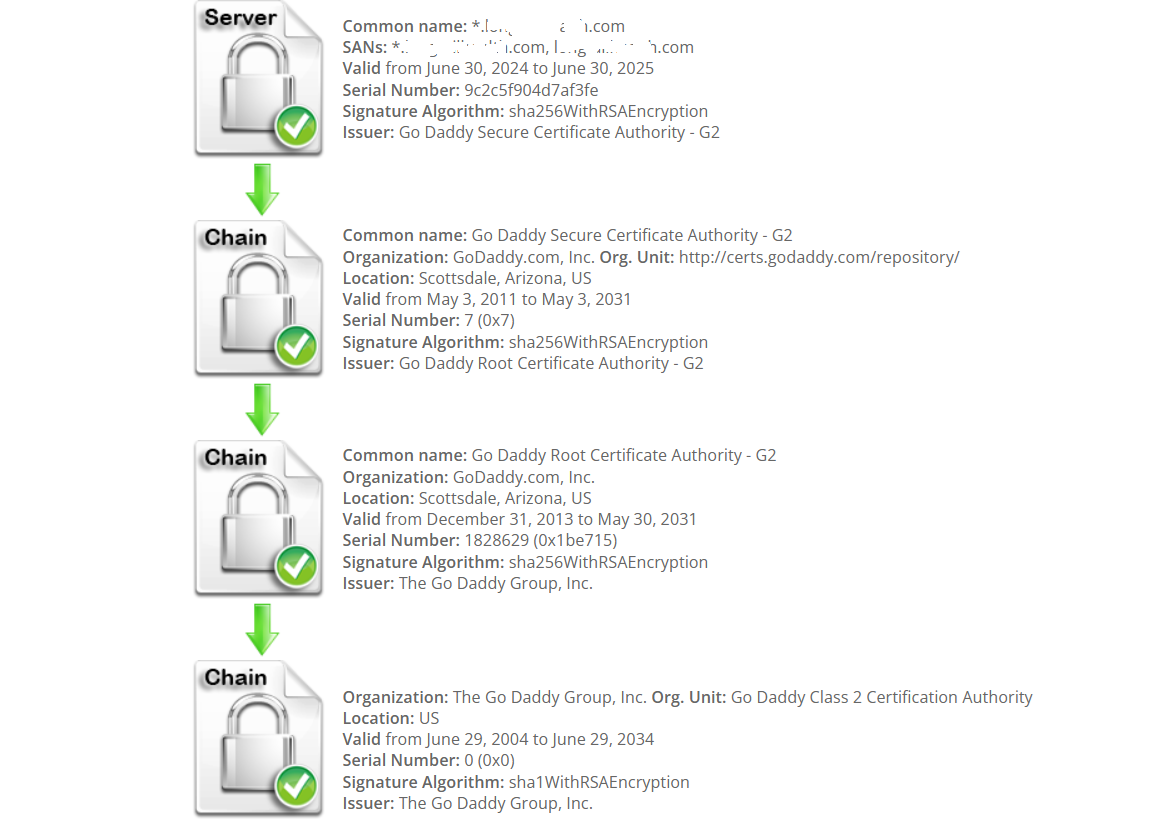
If the certificate chaining is correct, these tools will show a complete certificate chain, ensuring that your SSL certificate is trusted by all browsers and applications.
Conclusion
By following these steps, you ensure that your SSL certificate includes the necessary root and intermediate certificates, preventing SSL validation errors. Proper certificate chaining helps establish trust and ensures secure communication between clients and servers.
If you encounter issues, double-check that all certificates are in the correct order and reattempt the PFX file creation.
Happy securing! 🔒